Skip to content
Search
Charts
Expand menu
Collapse menu
Australian
Admiralty
New Zealand
Maps
Expand menu
Collapse menu
GA 1:50K
GA 1:100K
GA 1:250K
GA 1:1M
NSW 1:25K
NSW 1:50K
NSW 1:100K
QLD 1:25K
QLD 1:50K
QLD 1:100K
TASMAP 1:25K
TASMAP 1:50K
TASMAP 1:100K
TASMAP 1:250K
Historic
AusENC
Expand menu
Collapse menu
Port Packs
Coastal Packs
Voyager Packs
Australia Pack
About AusENC
Equipment
Expand menu
Collapse menu
Stationery
Publications
Expand menu
Collapse menu
Commerical
Tide Tables
Cruise Guides
Cartography
Expand menu
Collapse menu
Cartography
Free Maps & Resources
About Us
Expand menu
Collapse menu
Contact Us
About Us
Privacy
T&C's
Postage
Site navigation
Search
Search
Cart
Menu
Site navigation
Charts
Australian
Admiralty
New Zealand
Maps
GA 1:50K
GA 1:100K
GA 1:250K
GA 1:1M
NSW 1:25K
NSW 1:50K
NSW 1:100K
QLD 1:25K
QLD 1:50K
QLD 1:100K
TASMAP 1:25K
TASMAP 1:50K
TASMAP 1:100K
TASMAP 1:250K
Historic
AusENC
Port Packs
Coastal Packs
Voyager Packs
Australia Pack
About AusENC
Equipment
Stationery
Publications
Commerical
Tide Tables
Cruise Guides
Cartography
Cartography
Free Maps & Resources
About Us
Contact Us
About Us
Privacy
T&C's
Postage
Item added to cart.
View cart and check out
.
Close
Close
Charts
Sort by
Featured
Best Selling
Alphabetically, A-Z
Alphabetically, Z-A
Price, low to high
Price, high to low
Date, new to old
Date, old to new
Publishers
Products
Scales
Reset
AUS 220 - Plans In New South Wales (Sheet 1) - Withdrawn
Regular price
Free
View
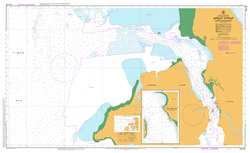
Apsley Strait (Northern Sheet)
From $44
View
AUS 219 - Plans In New South Wales (Sheet 2) - Withdrawn
Regular price
Free
View
AUS 217 - Hawkesbury River Including Cowan Creek - Withdrawn
Regular price
Free
View
AUS 21 - Melville Island Snake Bay
From $44
View
AUS 208 - Newcastle - Withdrawn
Regular price
Free
View
AUS 207 - Approaches To Newcastle
From $44
View
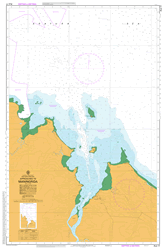
AUS 20 - Clarence Strait
From $44
View
AUS 196 - Port Botany - Withdrawn
Regular price
Free
View
AUS 195 - Approaches To Port Kembla
From $44
View
AUS 194 - Port Kembla Including Wollongong Harbour - Withdrawn
Regular price
Free
View
AUS 193 - Approaches To Jervis Bay - Withdrawn
Regular price
Free
View
AUS 192 - Twofold Bay
From $44
View
AUS 191 - Plans In New South Wales (Sheet 3) - Withdrawn
Regular price
Free
View
AUS 18 - Port Essington
From $44
View
AUS 178 - Plans In Tasmania (Sheet 2) - Withdrawn
Regular price
Free
View
AUS 175 - Spring Bay Including Triabunna - Withdrawn
Regular price
Free
View
AUS 174 - Plans In Tasmania (Sheet 4) - Withdrawn
Regular price
Free
View
AUS 170 - Mercury Passage - Withdrawn
Regular price
Free
View
AUS 17 - Approaches To Maningrida
From $44
View
←
1
…
21
22
23
24
25
→